

Mushroom harvesting is more than just picking fruiting bodies from a grow kit—it’s a science that can impact yield, future flushes, and overall mushroom quality. Whether you’re working with gourmet mushrooms like shiitake and lion’s mane or psychoactive varieties such as psilocybe cubensis, your harvest technique matters. This guide explores in detail the best practices for harvesting mushrooms, from ideal timing to preservation.
The Best Method for Mushroom Harvesting
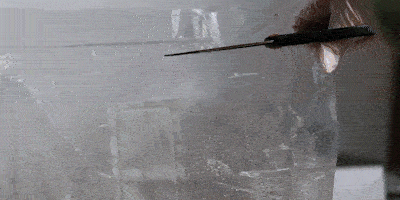
The optimal method for mushroom harvesting is to use a twist-and-pull motion at the base of the stem. This technique allows you to remove the entire fruiting body from the substrate without leaving remnants behind. Trimming mushrooms by slicing off the base may leave parts of the stem attached to the substrate, creating future contamination risks. These leftover pieces can rot, attract bacteria, and interfere with subsequent flushes.
Using the twist-and-pull method results in:
- Less substrate damage
- Cleaner harvest sites
- Reduced chances of bacterial blotch and green mold
- A better environment for new pins to emerge
Especially with varieties like psilocybe cubensis, the twist-and-pull method supports both cleanliness and yield, essential for efficient mushroom harvesting.
Why You Should Remove the Entire Stem
When you trim mushrooms by cutting just the top and leaving the base, you risk introducing rot and bacteria. The leftover stem tissue can degrade and become waterlogged, especially if you’re misting the block. This scenario leads to bacterial blotch—a form of decay that not only impacts the current harvest but can also compromise future ones. Picking mushrooms completely from the base helps preserve the health of the mycelium and encourages fresh, healthy growth for second and third flushes.
Furthermore, the base of the stem holds significant weight, so harvesting the full mushroom increases your total yield. Clean substrate equals a cleaner and more productive grow.

Your first genetics are on us.
Subscribe to our newsletter to get a free spore syringe.
How to Handle Pins and Aborts
When harvesting, remove all pins and aborted mushrooms at once. Aborts are underdeveloped mushrooms that won’t grow further once the primary fruiting bodies have matured. Leaving these small, stagnant growths on the block creates risk: they bruise easily, collect moisture, and eventually rot. This decay can spread bacterial blotch or other contaminants throughout the grow space and even infect future crops if tools and hands are not cleaned properly afterward.
Aborts are common in many varieties, but removing them completely is a simple practice that enhances your mushroom harvesting success.
Dealing with Side Pins and Underside Growth
It’s common for beginner growers to discover mushrooms growing along the sides or underneath their substrate block. This usually happens when light penetrates from below or the sides, signaling the mycelium to initiate fruiting in those areas.
To harvest side pins effectively:
- Gently remove the entire substrate cake from the grow bag.
- Place it on a clean surface (such as the top of the grow bag or a sanitized tray).
- Carefully harvest all visible mushrooms from every angle.
Even if you’re unsure about using side pins, removing them is better than allowing rot to set in. These side fruits may be smaller, but they contribute to overall yield and maintain hygiene within your grow space.
Proper Techniques for Drying After Mushroom Harvesting
After harvesting, drying mushrooms is the next critical step in preserving potency and preventing spoilage. The standard method involves a food dehydrator set between 135°F–145°F for at least 24 hours. Thick-stemmed varieties like Penis Envy may require more time or slicing into halves or quarters to ensure full moisture removal.
Signs of a properly dried mushroom include:
- Brittle texture (cracker dry)
- Clean snap when broken
- No soft or bendable stems/caps after several days of storage
If a mushroom bends days after dehydration, it wasn’t dried thoroughly and should be redried immediately. Retaining even small amounts of moisture invites bacteria and mold.
Freeze Dryers vs. Food Dehydrators
While food dehydrators do a great job, they often leave 5–10% residual moisture. Freeze dryers, on the other hand, offer near-total moisture removal (up to 99%) without degrading psilocybin or psilocin content. Freeze drying also preserves the mushroom’s shape, size, and color.
If you’re harvesting for long-term storage or medicinal use, investing in a freeze dryer can maximize quality and potency over time.
Storage After Mushroom Harvesting
After drying, mushrooms should be stored in airtight containers, ideally mason jars with desiccant packets. Silica or desiccant helps remove any remaining trace moisture left behind by the dehydrator. Store these jars in a dark, cool environment with near-zero humidity.
Never store dried mushrooms in the fridge or freezer unless they’re freshly picked and being trimmed within 12 hours. Cold environments can cause condensation and premature degradation.
Does Potency Degrade Over Time?
Yes, mushroom potency can diminish with time. The key cause is the oxidation of psilocin, especially when mushrooms are not fully dried. Psilocybin itself is stable, but its breakdown product, psilocin, is not. Exposure to light, heat, or oxygen can degrade it rapidly. Drying mushrooms correctly and storing them well can preserve their potency for many months.

Mushroom Harvesting Checklist
- Always harvest using a twist-and-pull technique.
- Remove all pins and aborts after each flush.
- Remove the cake from the bag to access side and bottom fruits.
- Dehydrate at 135°F–145°F until fruits are completely dry.
- Confirm dryness by checking for a clean break (not bendable).
- Store in airtight mason jars with desiccants in a dark, cool place.
- Consider freeze drying for highest preservation quality.
By following these best practices, your mushroom harvesting process will yield cleaner crops, better preservation, and higher overall potency. For growers looking to maximize quality and minimize contamination, mastering the harvest is an essential skill.
Stay tuned for more mushroom cultivation tips and deep dives into strain profiles, grow tek guides, and troubleshooting for beginners and advanced mycologists alike.