


Your first genetics are on us.
Subscribe to our newsletter to get a free spore syringe.
Preparing Your Workstation for Mushroom research
A clean, organized workspace helps streamline the harvesting from a microscopy kit process and reduces contamination risks. Prepare the following before you begin:
- A clean table wiped with 70% isopropyl alcohol.
- A pair of scissors or trimming shears.
- A trash bin or bag for discarded substrate pieces.
- A dehydrator pre-set to 130°F (54°C).
Remove your mushroom block gently from the microscopy kit and place it on top of the plastic liner. This setup makes cleanup easier and prevents cross-contamination.
The Twist-and-Pull Method: Best Harvesting Technique From A microscopy Kit
The most reliable harvesting technique is the twist and pull method.
- In the microscopy kit, grip the mushroom firmly at the base of the stem.
- Twist gently while pulling upward to remove the entire fruiting body.
- Place harvested mushrooms aside for trimming.
Why this method works best:
- Cleaner harvest site – Leaving no “butts” or partial stems behind helps prevent bacterial blotch.
- Less contamination – Open wounds in the substrate heal more effectively when the full mushroom is removed.
- Room for new flushes – Removing all pins from the microscopy kit, aborts, and remnants ensures the substrate can reset for the next round.
Even the smallest underdeveloped pins, also called aborts, should be removed during harvesting from the microscopy kit.
Avoiding Contamination After Harvest
One of the biggest risks post-harvest is contamination in the microscopy kit, especially from bacterial blotch (Bacillus spp.) or mold. To minimize issues:
- Never leave aborts, broken stems, or damaged tissue behind on the block.
- Wash the block gently under running water to remove leftover debris.
- Avoid standing water at the bottom of your microscopy kit—it promotes rot and can ruin future flushes.
If you notice pooling water, drain it immediately. Healthy mycelium thrives in moisture-rich environments, but excess water is a breeding ground for contamination.
Rehydrating for a Second Flush
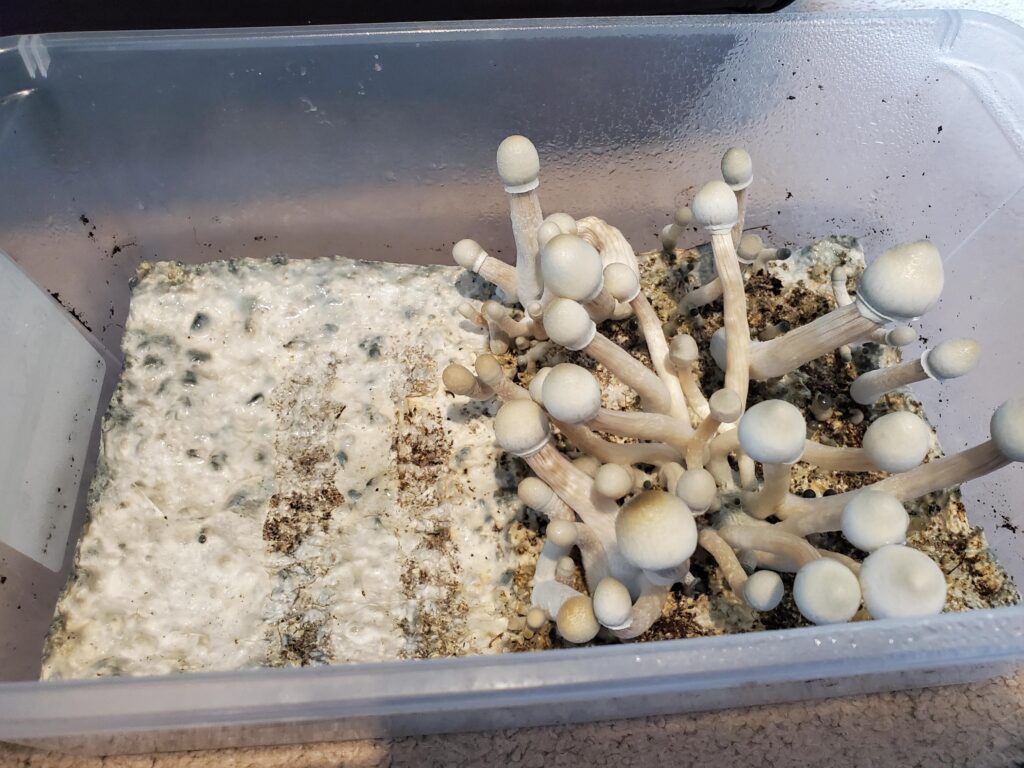
Once all mushrooms are harvested:
- Dunk your block in clean water for 1–2 hours to rehydrate.
- Pat dry and return it to the microscopy kit.
- Mist lightly around the walls of the bag and the top layer of substrate to restore humidity.
Rehydration sets the stage for second and third flushes, which often produce even thicker canopies if the first flush was modest.
Drying and Preserving Your Mushrooms
Proper dehydration is critical for long-term storage and potency retention.
- Set a food dehydrator to 135–145°F (57–63°C).
- Dry for at least 24 hours, adjusting based on mushroom thickness.
- For thick fruits like Penis Envy, cut stems in half or quarters to speed drying.
What Is “Cracker Dry”?
The term refers to mushrooms that snap cleanly in half, rather than bending. Even when cracker dry, mushrooms may retain 8–10% residual moisture, which is normal.
Always double-check mushrooms a day or two after drying. If they feel soft or bendable, dry them again before sealing in jars or bags.
Storage Tips
- Use mason jars with desiccant packs to remove leftover moisture.
- Store in a cool, dark, and dry environment.
- Avoid storing in the fridge or freezer long-term, as mushrooms will wilt or degrade.
Freeze dryers are the gold standard for preservation, removing up to 98% of moisture while maintaining size, shape, and potency—but they can be expensive for home use.
Final Thoughts on Mushroom research
Mushroom harvesting is both an art and a science. The best time to harvest is just before the veil breaks. Using the twist-and-pull method, rehydrating your block for future flushes, and properly drying to “cracker dry” will set you up for success.
With practice, you’ll fine-tune your harvesting technique and ensure that every flush is more rewarding than the last.